
Professional Painting Company
[/et_pb_text][et_pb_button button_text=”Get An Online Estimate” _builder_version=”4.16″ custom_button=”on” button_text_size=”14px” button_text_color=”#ff8555″ button_bg_color=”rgba(0,0,0,0)” button_bg_image=”https://ameritekpainting.com/wp-content/uploads/2021/05/painting_service_16.png” button_border_width=”0px” button_border_radius=”0px” button_letter_spacing=”1px” button_font=”Poppins|600||on|||||” button_icon=”$||divi||400″ custom_padding=”16px|40px|16px|40px|true|true” custom_padding_last_edited=”off|desktop” animation_direction=”left” global_colors_info=”{}” custom_padding__hover_enabled=”on” custom_padding__hover=”|60px||||false”][/et_pb_button][et_pb_text _builder_version=”4.21.0″ text_font=”Poppins||||||||” text_text_color=”#00122a” text_font_size=”18px” header_font_size=”24px” animation_direction=”left” text_font_size_tablet=”” text_font_size_phone=”20px” text_font_size_last_edited=”on|phone” global_colors_info=”{}”]Or Call: (303)471-2456
[/et_pb_text][/et_pb_column][et_pb_column type=”1_3″ _builder_version=”4.16″ custom_padding=”|||” global_colors_info=”{}” custom_padding__hover=”|||”][/et_pb_column][/et_pb_row][/et_pb_section][et_pb_section fb_built=”1″ specialty=”on” use_background_color_gradient_1=”on” background_color_gradient_direction_1=”90deg” background_color_gradient_stops_1=”rgba(0,18,42,0.03) 57%|rgba(0,18,42,0) 100%” background_color_gradient_start_1=”rgba(0,18,42,0.03)” background_color_gradient_end_1=”rgba(0,18,42,0)” background_color_gradient_start_position_1=”57%” padding_top_1=”60px” padding_right_1=”40px” padding_bottom_1=”60px” padding_left_1=”40px” padding_top_bottom_link_1=”true” padding_left_right_link_1=”true” admin_label=”Features” _builder_version=”4.16″ custom_padding=”|0px|0|0px|false|false” use_custom_width=”on” global_colors_info=”{}”][et_pb_column type=”1_2″ _builder_version=”4.16″ use_background_color_gradient=”on” background_color_gradient_direction=”90deg” background_color_gradient_stops=”rgba(0,18,42,0.03) 57%|rgba(0,18,42,0) 100%” background_color_gradient_start=”rgba(0,18,42,0.03)” background_color_gradient_start_position=”57%” background_color_gradient_end=”rgba(0,18,42,0)” custom_padding=”|||” global_colors_info=”{}” padding_bottom__hover=”60px” padding_left__hover=”40px” padding_right__hover=”40px” padding_top__hover=”60px” parallax__hover=”off” parallax_method__hover=”on” use_background_color_gradient__hover=”on” background_color_gradient_start__hover=”rgba(0,18,42,0.03)” background_color_gradient_end__hover=”rgba(0,18,42,0)” background_color_gradient_direction__hover=”90deg” background_color_gradient_start_position__hover=”57%” custom_padding__hover=”|||” background_color_gradient_stops__hover=”rgba(0,18,42,0.03) 57%|rgba(0,18,42,0) 100%”][et_pb_text _builder_version=”4.21.0″ text_font=”||||||||” header_font=”||||||||” header_2_font=”Poppins|600|||||||” header_2_text_color=”#2b5a93″ header_2_font_size=”42px” header_2_line_height=”1.4em” header_4_font=”Poppins|600||on|||||” header_4_text_color=”#a0a6b0″ header_4_letter_spacing=”4px” header_4_line_height=”1.8em” custom_margin=”||10px” animation_direction=”left” hover_enabled=”0″ header_2_font_size_tablet=”30px” header_2_font_size_phone=”20px” header_2_font_size_last_edited=”on|phone” header_4_font_size_tablet=”” header_4_font_size_phone=”12px” header_4_font_size_last_edited=”on|phone” locked=”off” global_colors_info=”{}” sticky_enabled=”0″]Quality first
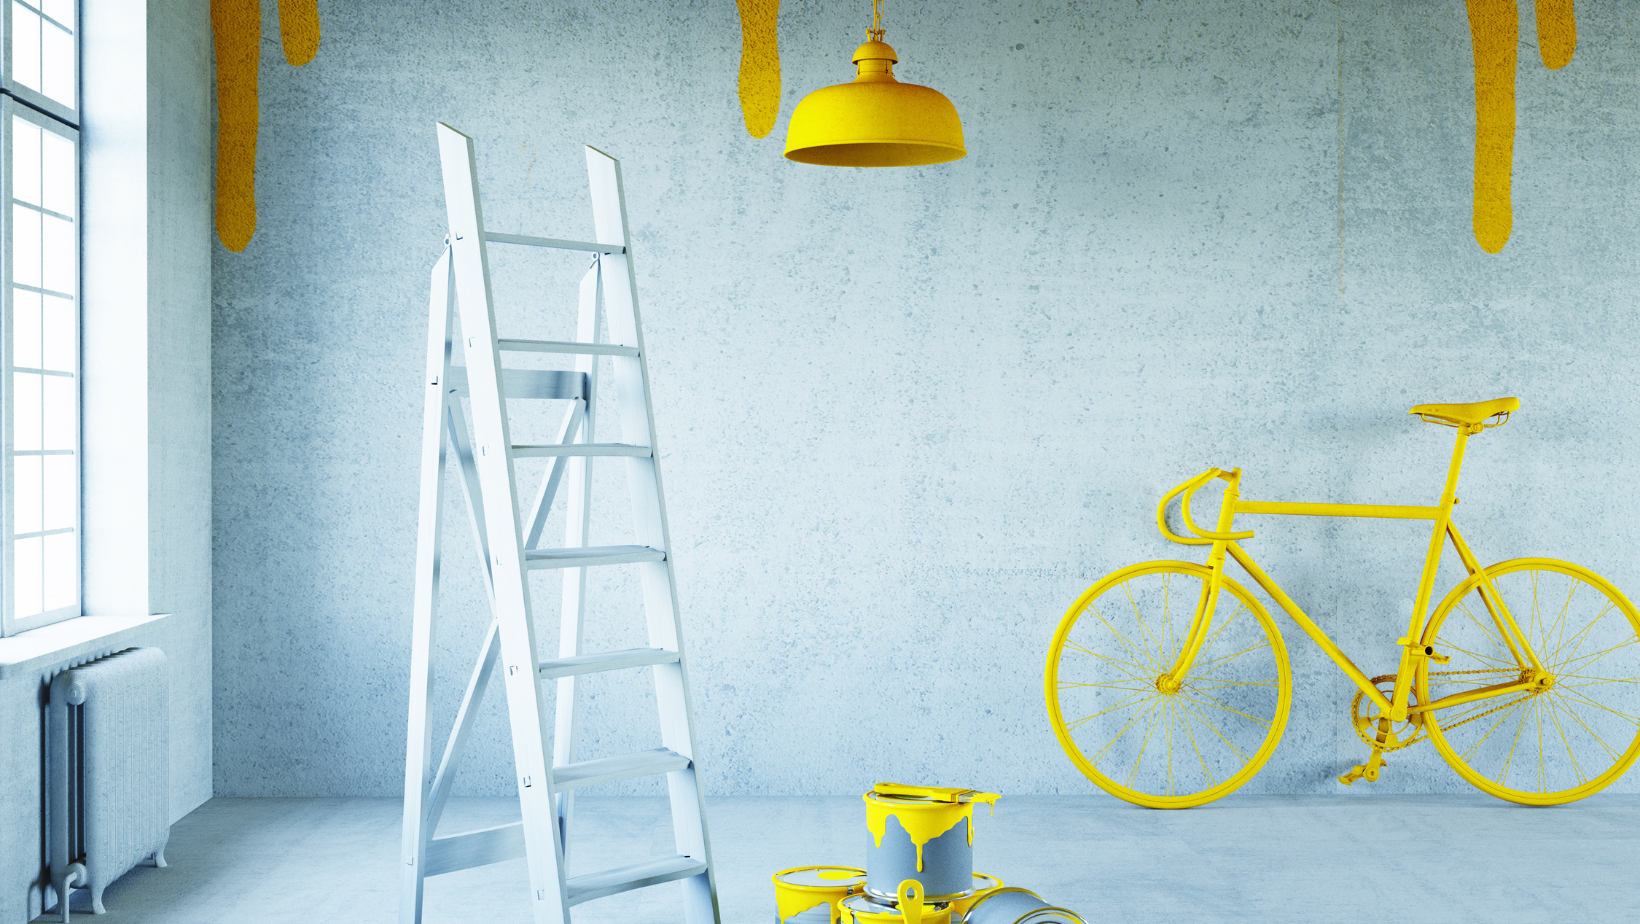
Best Interior Painting Guide
[/et_pb_text][et_pb_text _builder_version=”4.21.0″ _module_preset=”default” link_option_url=”ameritekpainting.com/contact” global_colors_info=”{}”]Paintbrush Holding
You must hold the brush correctly if you want to paint the interior like a master. While gripping the ferrule (the metal piece that binds the bristles together), which is located between your index and middle fingers, place the brush’s handle flat on the back of your thumb. A slanted brush’s point should be on the finger side rather than the thumb side, for best interior painting results.
What Is the Time Frame for Painting a interior room
A typical-sized room takes two to four days to paint. That is how long it takes to properly prepare, prime, and paint. It requires more work, but when you look at the end result, you’ll realize it was time well spent
Fix errors while they’re still wet
Don’t worry if an accidental brushstroke touches the wall; wet paint is quite simple to remove. You can wipe the wet paint with a finger and a damp cloth if you keep one handy. To avoid having the extra cloth touch the wet baseboard, simply wad it up in your palm.
Even professionals have been known to use painter’s tape occasionally. They frequently use tape to cover the surface when painting against completed materials like flooring and woodwork. However, they generally forgo the tape while painting walls and trim in favor of their expertise and steady hands.
Most of us are capable of doing a decent job painting a room. However, a skilled professional does a fantastic job. Professional painters obviously have more expertise than the ordinary homeowner, but they also have access to techniques and tips that help them paint better.
Purge the room of everything.
Start by removing everything from the space. Larger furniture can occasionally be left covered in the middle of larger rooms. Take everything out if you are fixing drywall. Dust from drywall is everywhere.
Remove the hardware, doors, and lighting fixtures, and then use masking tape to identify everything. Invest in drop cloths as well. Purchase drop cloths of the highest caliber, such as canvas or paper-backed plastic. It should be noted that paint easily penetrates thin textiles, including bedsheets. Plastic sheeting is functional, although it is highly slick and doesn’t catch spills.
Look for cracks and dents, then fix them
Minor cracks, bumps, or nail pops will be visible even when an antique lamp with a naked bulb is held close to the wall.
Use a rubberized spray-on primer called Good-Bye Crack to cover reoccurring stress cracks rather than the conventional tape-and-spackle technique. Using damaged wood calls for a somewhat different strategy.
Use painter’s putty or a two-part wood filler to repair damaged trim. Using a drywall pole sander, remove any fixes, lumps, and nibs. Some of our professionals sand all previously painted walls, regardless of their shape, for smoother surfaces and better adhesion.
[/et_pb_text][et_pb_divider color=”#ddf8f2″ divider_position=”center” divider_weight=”3px” _builder_version=”4.21.0″ max_width=”80px” height=”3px” animation_direction=”left” locked=”off” global_colors_info=”{}”]
What to do when considering hiring an Interior Painting Company: Painting Company Arvada
You might be considering hiring a professional interior painter to complete a paint job on your home. Before you do so, you should finish a few tasks that have to do with the job. Consider the questions to ask the company you are interested in, and know what to expect. Painting Company Arvada
The main aspect that most people worry about is cost. You obviously need to find a company that fits your budget and also find out what they charge for. The first thing to ask is what type of paint they use, and if you can buy it separately. In some cases, you might find that they use a brand that is not very good, yet they charge a lot for it, which means buying your own would be cheaper. However, some quality companies purchase paint from only the best retailers and do not charge you as much as you might think for a great product. Painting Company Arvada
You should also find out if the interior painter you have selected charges extra to move furniture. If so, it may be cheaper to move it yourself with the help of some friends or family members. Of course, if you do not have that luxury and have a bad back, paying a small fee may be worth it to have large furniture moved for you. Some companies even throw this in for free, especially if you are having a big job completed, so find out before you budget.
You may be trying to save money by having an interior painter only complete one or two rooms. Perhaps you want to get the rest of the house done later but cannot afford it now, or think you will paint it yourself in the future. However, be aware that some companies offer a discount if you get more than one room painted, as they will not have to come back a different time and set up again. If you can pay for it now, it may be worth it to have them paint more than you originally planned so that you can save money overall. Painting Company Arvada
Painting can be a big job that gets time-consuming for you to do on your own, or expensive when you pay someone else. However, if you plan well enough and do your research on local companies, you can save some money. Knowing what you will have to pay for with an interior painter, and finding out about possible discounts, can help you get a great result within your budget.
For the best painting company visit
https://www.ameritekpainting.com
#interiorpainting #paintingcompany #painters #PaintingCompanyArvada
Use the Two-Step Sanding Method
Sanding not only smoothes away paint chips but also gives the surface teeth for the subsequent coat of paint. Use a sanding sponge rather than sandpaper for shiny trim. Sponges endure longer than paper and conform to the curve of the trim.
To avoid compatibility issues when applying latex over alkyd paint or when unsure of the original finish, follow the hand-sanding with liquid sandpaper to ensure the surface is entirely deglossed.
Walls made of sponges
Do not paint over dust unless you enjoy having textured walls. With a gentle cleanser, clean the walls. Use a 50/50 bleach and water solution on smoke-stained walls.
Use two buckets to clean a wall. Fill your rag or sponge with cleaning solution, then scrub. Rinse the sponge in a fresh pail of water before redipping it.
Fill up any cracks
Using a paintable acrylic-latex caulk to fill in cracks reduces airflow and restores the appearance of your trim. Because too much caulk creates a mess, the trick to using caulk is to cut the tip smaller than you believe it should be.
In order to avoid stretching out the nozzle, use a tiny wire rather than a nail to break the inner seal. Also think about purchasing a dripless caulk gun, which will automatically reduce pressure after each trigger pull to stop unwelcome leaking.
These are some of the tips, professional painters have shared about interior painting. However, many will find time is money, and hiring the best interior painting company would take the burden off their shoulders. Hope this article helped, happy painting!
[/et_pb_text][/et_pb_column_inner][/et_pb_row_inner][/et_pb_column][/et_pb_section][et_pb_section fb_built=”1″ admin_label=”Services” _builder_version=”4.16″ custom_padding=”0|0px|54px|0px|false|false” custom_width_px__hover=”1080px” custom_width_px__hover_enabled=”1080px” custom_width_percent__hover=”80%” custom_width_percent__hover_enabled=”80%” global_colors_info=”{}” gutter_width__hover=”3″ gutter_width__hover_enabled=”3″ parallax_1__hover=”off” parallax_1__hover_enabled=”off” parallax_2__hover=”off” parallax_2__hover_enabled=”off” parallax_3__hover=”off” parallax_3__hover_enabled=”off” parallax_method_1__hover=”on” parallax_method_1__hover_enabled=”on” parallax_method_2__hover=”on” parallax_method_2__hover_enabled=”on” parallax_method_3__hover=”on” parallax_method_3__hover_enabled=”on” use_background_color_gradient__hover=”off” use_background_color_gradient__hover_enabled=”off” background_color_gradient_start__hover=”#2b87da” background_color_gradient_start__hover_enabled=”#2b87da” background_color_gradient_end__hover=”#29c4a9″ background_color_gradient_end__hover_enabled=”#29c4a9″ background_color_gradient_type__hover=”linear” background_color_gradient_type__hover_enabled=”linear” background_color_gradient_direction__hover=”180deg” background_color_gradient_direction__hover_enabled=”180deg” background_color_gradient_direction_radial__hover=”center” background_color_gradient_direction_radial__hover_enabled=”center” background_color_gradient_start_position__hover=”0%” background_color_gradient_start_position__hover_enabled=”0%” background_color_gradient_end_position__hover=”100%” background_color_gradient_end_position__hover_enabled=”100%” background_color_gradient_overlays_image__hover=”off” background_color_gradient_overlays_image__hover_enabled=”off” parallax__hover=”off” parallax__hover_enabled=”off” parallax_method__hover=”on” parallax_method__hover_enabled=”on” background_size__hover=”cover” background_size__hover_enabled=”cover” background_position__hover=”center” background_position__hover_enabled=”center” background_repeat__hover=”no-repeat” background_repeat__hover_enabled=”no-repeat” background_blend__hover=”normal” background_blend__hover_enabled=”normal” allow_player_pause__hover=”off” allow_player_pause__hover_enabled=”off” background_video_pause_outside_viewport__hover=”on” background_video_pause_outside_viewport__hover_enabled=”on” inner_shadow__hover=”off” inner_shadow__hover_enabled=”off” make_fullwidth__hover=”off” make_fullwidth__hover_enabled=”off” use_custom_width__hover=”off” use_custom_width__hover_enabled=”off” width_unit__hover=”on” width_unit__hover_enabled=”on” make_equal__hover=”off” make_equal__hover_enabled=”off” use_custom_gutter__hover=”off” use_custom_gutter__hover_enabled=”off” border_radii__hover=”on||||” border_radii__hover_enabled=”on||||” box_shadow_style__hover=”none” box_shadow_style__hover_enabled=”none” box_shadow_color__hover=”rgba(0,0,0,0.3)” box_shadow_color__hover_enabled=”rgba(0,0,0,0.3)” max_width__hover=”100%” max_width__hover_enabled=”100%” filter_hue_rotate__hover=”0deg” filter_hue_rotate__hover_enabled=”0deg” filter_saturate__hover=”100%” filter_saturate__hover_enabled=”100%” filter_brightness__hover=”100%” filter_brightness__hover_enabled=”100%” filter_contrast__hover=”100%” filter_contrast__hover_enabled=”100%” filter_invert__hover=”0%” filter_invert__hover_enabled=”0%” filter_sepia__hover=”0%” filter_sepia__hover_enabled=”0%” filter_opacity__hover=”100%” filter_opacity__hover_enabled=”100%” filter_blur__hover=”0px” filter_blur__hover_enabled=”0px” mix_blend_mode__hover=”normal” mix_blend_mode__hover_enabled=”normal” animation_style__hover=”none” animation_style__hover_enabled=”none” animation_repeat__hover=”once” animation_repeat__hover_enabled=”once” animation_direction__hover=”center” animation_direction__hover_enabled=”center” animation_duration__hover=”1000ms” animation_duration__hover_enabled=”1000ms” animation_delay__hover=”0ms” animation_delay__hover_enabled=”0ms” animation_intensity_slide__hover=”50%” animation_intensity_slide__hover_enabled=”50%” animation_intensity_zoom__hover=”50%” animation_intensity_zoom__hover_enabled=”50%” animation_intensity_flip__hover=”50%” animation_intensity_flip__hover_enabled=”50%” animation_intensity_fold__hover=”50%” animation_intensity_fold__hover_enabled=”50%” animation_intensity_roll__hover=”50%” animation_intensity_roll__hover_enabled=”50%” animation_starting_opacity__hover=”0%” animation_starting_opacity__hover_enabled=”0%” animation_speed_curve__hover=”ease-in-out” animation_speed_curve__hover_enabled=”ease-in-out” hover_transition_duration__hover=”300ms” hover_transition_duration__hover_enabled=”300ms” hover_transition_delay__hover=”0ms” hover_transition_delay__hover_enabled=”0ms” hover_transition_speed_curve__hover=”ease” hover_transition_speed_curve__hover_enabled=”ease” background_color_gradient_stops__hover=”#2b87da 0%|#29c4a9 100%”][et_pb_row column_structure=”1_3,1_3,1_3″ _builder_version=”4.16″ background_color=”#f2f8fc” use_background_color_gradient=”on” background_color_gradient_stops=”rgba(242,248,252,0.93) 0%|rgba(242,248,252,0.68) 100%” background_color_gradient_overlays_image=”on” background_color_gradient_start=”rgba(242,248,252,0.93)” background_color_gradient_end=”rgba(242,248,252,0.68)” background_image=”https://ameritekpainting.com/wp-content/uploads/2021/05/painting_service_27.jpg” background_position=”bottom_right” custom_padding=”60px|40px|180px|40px|false|true” custom_width_px__hover=”1080px” custom_width_px__hover_enabled=”1080px” custom_width_percent__hover=”80%” custom_width_percent__hover_enabled=”80%” global_colors_info=”{}” gutter_width__hover=”3″ gutter_width__hover_enabled=”3″ parallax_1__hover=”off” parallax_1__hover_enabled=”off” parallax_2__hover=”off” parallax_2__hover_enabled=”off” parallax_3__hover=”off” parallax_3__hover_enabled=”off” parallax_4__hover=”off” parallax_4__hover_enabled=”off” parallax_5__hover=”off” parallax_5__hover_enabled=”off” parallax_6__hover=”off” parallax_6__hover_enabled=”off” parallax_method_1__hover=”on” parallax_method_1__hover_enabled=”on” parallax_method_2__hover=”on” parallax_method_2__hover_enabled=”on” parallax_method_3__hover=”on” parallax_method_3__hover_enabled=”on” parallax_method_4__hover=”on” parallax_method_4__hover_enabled=”on” parallax_method_5__hover=”on” parallax_method_5__hover_enabled=”on” parallax_method_6__hover=”on” parallax_method_6__hover_enabled=”on” use_background_color_gradient__hover=”off” use_background_color_gradient__hover_enabled=”off” background_color_gradient_start__hover=”#2b87da” background_color_gradient_start__hover_enabled=”#2b87da” background_color_gradient_end__hover=”#29c4a9″ background_color_gradient_end__hover_enabled=”#29c4a9″ background_color_gradient_type__hover=”linear” background_color_gradient_type__hover_enabled=”linear” background_color_gradient_direction__hover=”180deg” background_color_gradient_direction__hover_enabled=”180deg” background_color_gradient_direction_radial__hover=”center” background_color_gradient_direction_radial__hover_enabled=”center” background_color_gradient_start_position__hover=”0%” background_color_gradient_start_position__hover_enabled=”0%” background_color_gradient_end_position__hover=”100%” background_color_gradient_end_position__hover_enabled=”100%” background_color_gradient_overlays_image__hover=”off” background_color_gradient_overlays_image__hover_enabled=”off” parallax__hover=”off” parallax__hover_enabled=”off” parallax_method__hover=”on” parallax_method__hover_enabled=”on” background_size__hover=”cover” background_size__hover_enabled=”cover” background_position__hover=”center” background_position__hover_enabled=”center” background_repeat__hover=”no-repeat” background_repeat__hover_enabled=”no-repeat” background_blend__hover=”normal” background_blend__hover_enabled=”normal” allow_player_pause__hover=”off” allow_player_pause__hover_enabled=”off” background_video_pause_outside_viewport__hover=”on” background_video_pause_outside_viewport__hover_enabled=”on” make_fullwidth__hover=”off” make_fullwidth__hover_enabled=”off” use_custom_width__hover=”off” use_custom_width__hover_enabled=”off” width_unit__hover=”on” width_unit__hover_enabled=”on” use_custom_gutter__hover=”off” use_custom_gutter__hover_enabled=”off” make_equal__hover=”off” make_equal__hover_enabled=”off” border_radii__hover=”on||||” border_radii__hover_enabled=”on||||” box_shadow_style__hover=”none” box_shadow_style__hover_enabled=”none” box_shadow_color__hover=”rgba(0,0,0,0.3)” box_shadow_color__hover_enabled=”rgba(0,0,0,0.3)” filter_hue_rotate__hover=”0deg” filter_hue_rotate__hover_enabled=”0deg” filter_saturate__hover=”100%” filter_saturate__hover_enabled=”100%” filter_brightness__hover=”100%” filter_brightness__hover_enabled=”100%” filter_contrast__hover=”100%” filter_contrast__hover_enabled=”100%” filter_invert__hover=”0%” filter_invert__hover_enabled=”0%” filter_sepia__hover=”0%” filter_sepia__hover_enabled=”0%” filter_opacity__hover=”100%” filter_opacity__hover_enabled=”100%” filter_blur__hover=”0px” filter_blur__hover_enabled=”0px” mix_blend_mode__hover=”normal” mix_blend_mode__hover_enabled=”normal” animation_style__hover=”none” animation_style__hover_enabled=”none” animation_repeat__hover=”once” animation_repeat__hover_enabled=”once” animation_direction__hover=”center” animation_direction__hover_enabled=”center” animation_duration__hover=”1000ms” animation_duration__hover_enabled=”1000ms” animation_delay__hover=”0ms” animation_delay__hover_enabled=”0ms” animation_intensity_slide__hover=”50%” animation_intensity_slide__hover_enabled=”50%” animation_intensity_zoom__hover=”50%” animation_intensity_zoom__hover_enabled=”50%” animation_intensity_flip__hover=”50%” animation_intensity_flip__hover_enabled=”50%” animation_intensity_fold__hover=”50%” animation_intensity_fold__hover_enabled=”50%” animation_intensity_roll__hover=”50%” animation_intensity_roll__hover_enabled=”50%” animation_starting_opacity__hover=”0%” animation_starting_opacity__hover_enabled=”0%” animation_speed_curve__hover=”ease-in-out” animation_speed_curve__hover_enabled=”ease-in-out” hover_transition_duration__hover=”300ms” hover_transition_duration__hover_enabled=”300ms” hover_transition_delay__hover=”0ms” hover_transition_delay__hover_enabled=”0ms” hover_transition_speed_curve__hover=”ease” hover_transition_speed_curve__hover_enabled=”ease” background_color_gradient_stops__hover=”#2b87da 0%|#29c4a9 100%”][et_pb_column type=”1_3″ _builder_version=”4.16″ custom_padding=”|||” global_colors_info=”{}” custom_padding__hover=”|||”][et_pb_text _builder_version=”4.16″ header_3_font=”Poppins|600|||||||” header_3_text_align=”left” header_3_font_size=”16px” header_3_line_height=”1.4em” animation_direction=”left” global_colors_info=”{}” header_font_size__hover=”30px” header_font_size__hover_enabled=”30px” header_letter_spacing__hover=”0px” header_letter_spacing__hover_enabled=”0px” header_text_shadow_style__hover=”none” header_text_shadow_style__hover_enabled=”none” header_text_shadow_color__hover=”rgba(0,0,0,0.4)” header_text_shadow_color__hover_enabled=”rgba(0,0,0,0.4)” header_2_font_size__hover=”26px” header_2_font_size__hover_enabled=”26px” header_2_letter_spacing__hover=”0px” header_2_letter_spacing__hover_enabled=”0px” header_2_line_height__hover=”1em” header_2_line_height__hover_enabled=”1em” header_2_text_shadow_style__hover=”none” header_2_text_shadow_style__hover_enabled=”none” header_2_text_shadow_color__hover=”rgba(0,0,0,0.4)” header_2_text_shadow_color__hover_enabled=”rgba(0,0,0,0.4)” header_3_font_size__hover=”22px” header_3_font_size__hover_enabled=”22px” header_3_letter_spacing__hover=”0px” header_3_letter_spacing__hover_enabled=”0px” header_3_line_height__hover=”1em” header_3_line_height__hover_enabled=”1em” header_3_text_shadow_style__hover=”none” header_3_text_shadow_style__hover_enabled=”none” header_3_text_shadow_color__hover=”rgba(0,0,0,0.4)” header_3_text_shadow_color__hover_enabled=”rgba(0,0,0,0.4)” header_4_font_size__hover=”18px” header_4_font_size__hover_enabled=”18px” header_4_letter_spacing__hover=”0px” header_4_letter_spacing__hover_enabled=”0px” header_4_line_height__hover=”1em” header_4_line_height__hover_enabled=”1em” header_4_text_shadow_style__hover=”none” header_4_text_shadow_style__hover_enabled=”none” header_4_text_shadow_color__hover=”rgba(0,0,0,0.4)” header_4_text_shadow_color__hover_enabled=”rgba(0,0,0,0.4)” header_5_font_size__hover=”16px” header_5_font_size__hover_enabled=”16px” header_5_letter_spacing__hover=”0px” header_5_letter_spacing__hover_enabled=”0px” header_5_line_height__hover=”1em” header_5_line_height__hover_enabled=”1em” header_5_text_shadow_style__hover=”none” header_5_text_shadow_style__hover_enabled=”none” header_5_text_shadow_color__hover=”rgba(0,0,0,0.4)” header_5_text_shadow_color__hover_enabled=”rgba(0,0,0,0.4)” header_6_font_size__hover=”14px” header_6_font_size__hover_enabled=”14px” header_6_letter_spacing__hover=”0px” header_6_letter_spacing__hover_enabled=”0px” header_6_line_height__hover=”1em” header_6_line_height__hover_enabled=”1em” header_6_text_shadow_style__hover=”none” header_6_text_shadow_style__hover_enabled=”none” header_6_text_shadow_color__hover=”rgba(0,0,0,0.4)” header_6_text_shadow_color__hover_enabled=”rgba(0,0,0,0.4)”]